

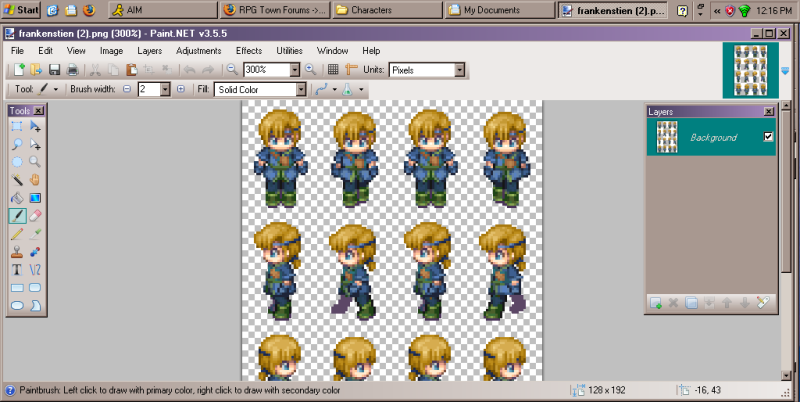
There's only so much you can do with the default sprites and creating your own from scratch is not always the easiest thing. Luckily there is an easy solution for adding some more variety to your cast of characters: chopping them up and sewing them back together. I'll be using XP sprites since that's what I use, but this'll work for the default sprites from any version. The program I'll be using is Paint.NET. You could get away with regular old Paint but it'll be more frustrating and recoloring will take far longer.
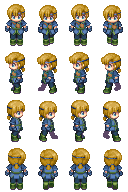
First we have to decide which sprites to sew together. I'm going to be working on my main character, Mariana. She'll spend most of the game in her traveling clothes seen below, but before she gets the job that starts her on her journey she wears a dress. Incidentally her main sprite is a recolor of one of the hunters, so you can see that even without cutting the sprites up you can still change the look. I'll cover how to do this kind of recolor at the end of the tutorial.
Default Sprite:
Mariana:
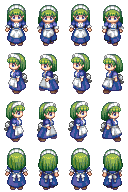
I decided to use the body of the maid sprite for her pre-travel dress:
The first step is to get all the body parts spread out on the table. Start with one sprite, any of them, and just open it into Paint.NET
Then go to the folder where the sprites are and click and drag the other sprite into the window. This menu will pop up:
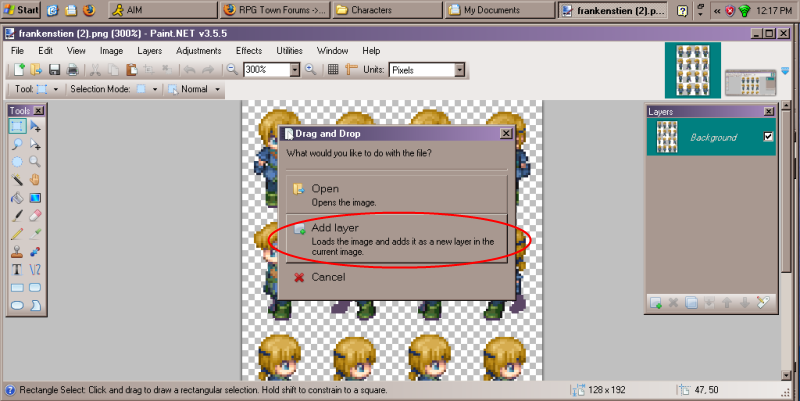
Add into layers is what you want. Then you'll have each set of sprites on its own layer. You can make the layers invisible by clicking the little check next to their names in the layers menu. It helps to only be looking at one at a time in the first steps.
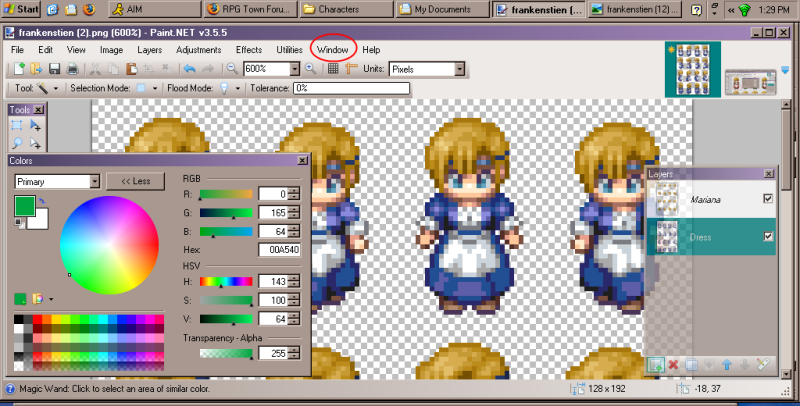
The next step is to strip away the extraneous limbs and organs. In this case I started with taking off most of the maid's skull. Whenever the color of what you're trying to take away is different from other parts of the sprite--here, the fact that nothing but the maid's hair is green--then use the magic wand tool.
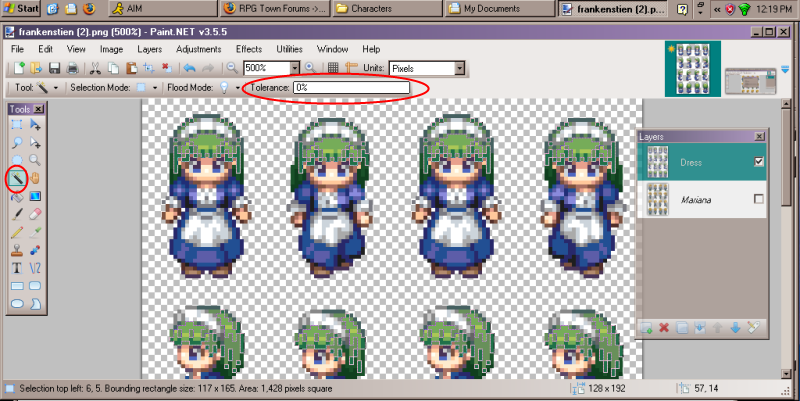
BE SURE that tolerance is set to 0%. If left on the default of 50% then it would probably select her blue dress as well.
In order to do this quickly hold down the Shift and Ctrl keys as you click on the different areas of color. Shift will select all pixels of that color in the layer and Ctrl will keep adding to the selection instead of deselecting the last color and only selecting the new one.
And voila! She's been scalped.
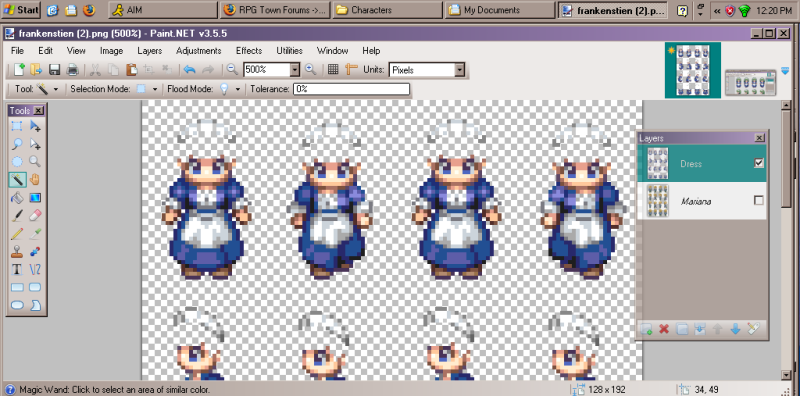
The next step is to remove the frilly hat since Mariana has her mullet headband as a hair accessory. In this case using the Shift+Ctrl+click method won't work very well since that would also delete her apron, which I do want to keep. So I will use the box selector tool to capture all the hats. You can also hit Ctrl with this tool to make multiple boxes.
The maid then gets to keep her face since it's going to be completely covered. On to decapitating my main character!
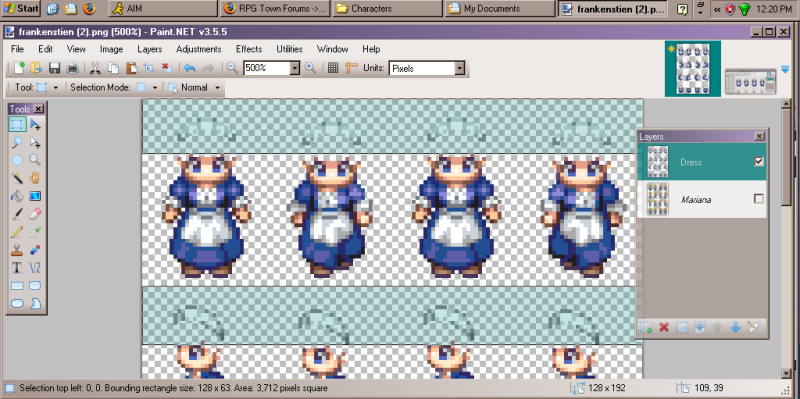
The first step is to get rid of the majority of Mariana's body. I do this with the box selector and delete everything up to her chin. Now I only have to delete her shoulders. In order to make this go faster, I selected what was shown below...
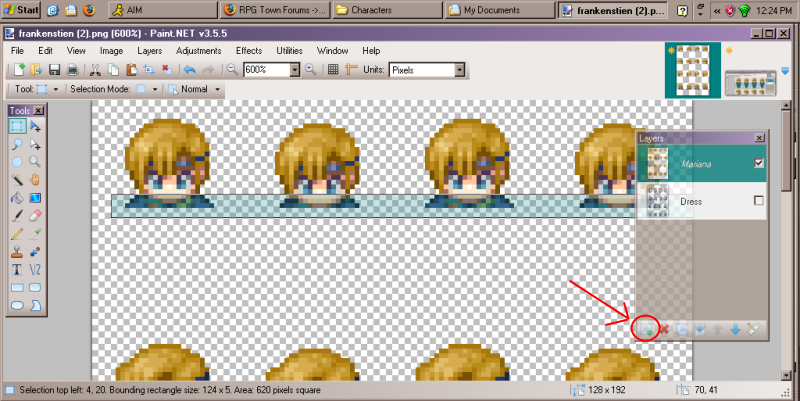
And then cut and pasted it into a new layer. This way I could magic wand Shift+Ctrl+click all of the blue bits of shirt without getting rid of her headband.
When all that was left was her head, I merged the severed chin layer back down into the head layer.
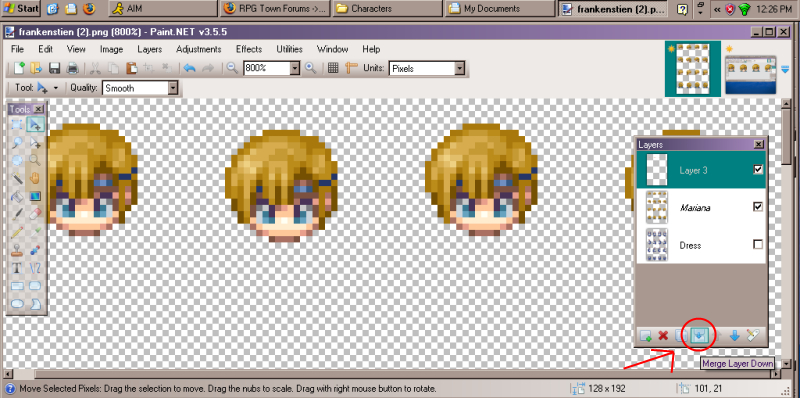
Dr. Frank'n'Furter would be proud.
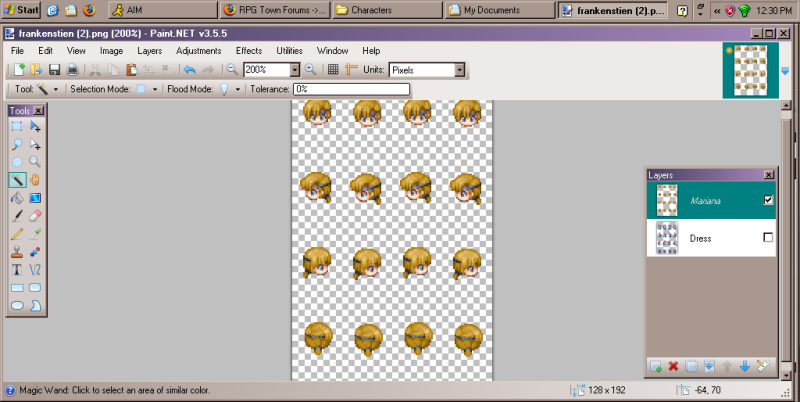
Now it is time to sew the two parts together. When the dress layer is made visible again we can see that there's not much of a problem with the edges matching up with the exception of the up facing set.
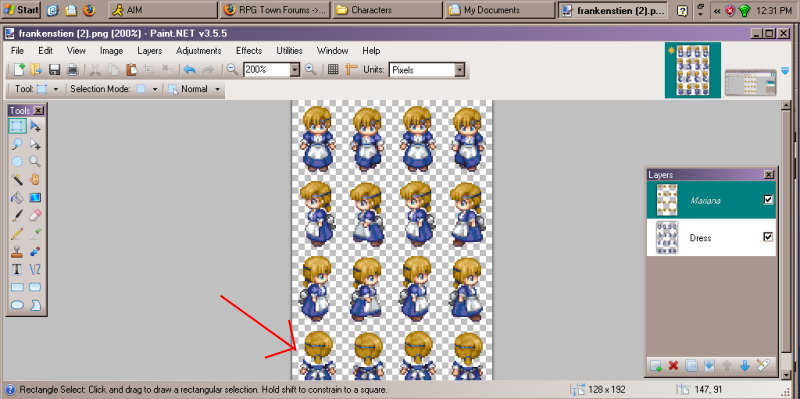
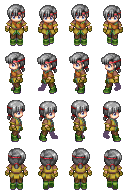
It's time to bring in a third donor! Look for a sprite of the same height as the one you're working on, one who's not wearing anything bulky. I ended up using the female prisoner. Place this layer below the others to serve as a guide.
Our next stars are the pencil and eyedropper combo. When the eyedropper tool is selected, choose the option of 'switch to pencil tool'; it'll make things go faster.
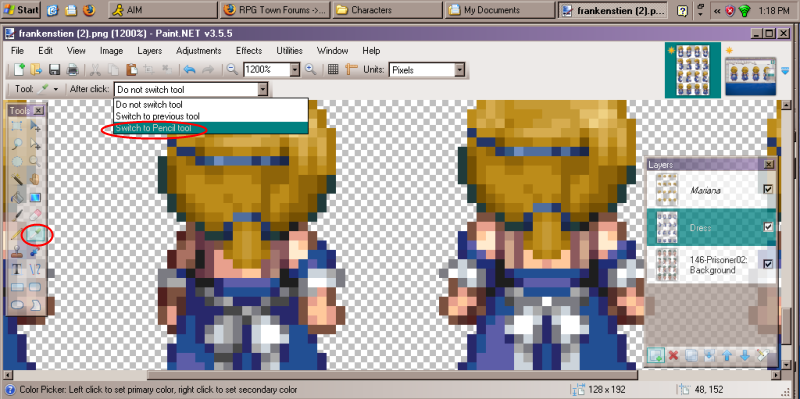
Then, on the DRESS layer since that's where the shoulders are missing, select the appropriate darker colors and fill in the outline and where the shadows at the armpits would be. Don't bother filling in the highlights at this time, just the shadow.

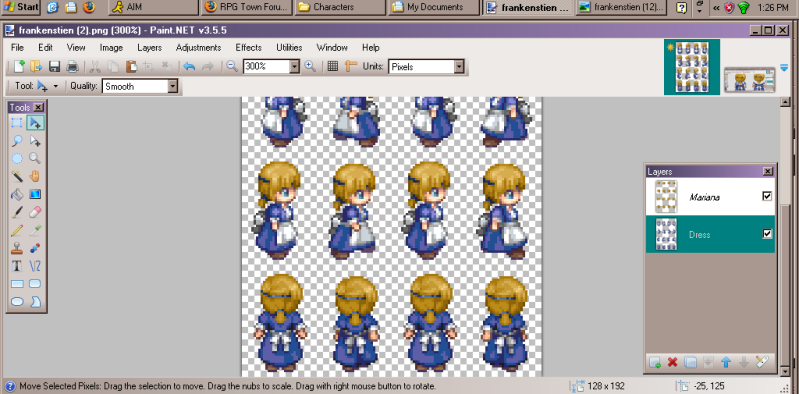
After you've done that for all the necessary sprites, delete the guide layer and fill in the rest of the missing parts. Getting the shading right is mostly a process of laying down a few pixels, zooming out, and seeing if it looks right. Note that you only have to do two sprites: one standing still and one walking. The standing still one you can copy right over and the walking you can copy, paste into a new layer, flip the layer horizontally, and then lay it over the mirrored sprite.
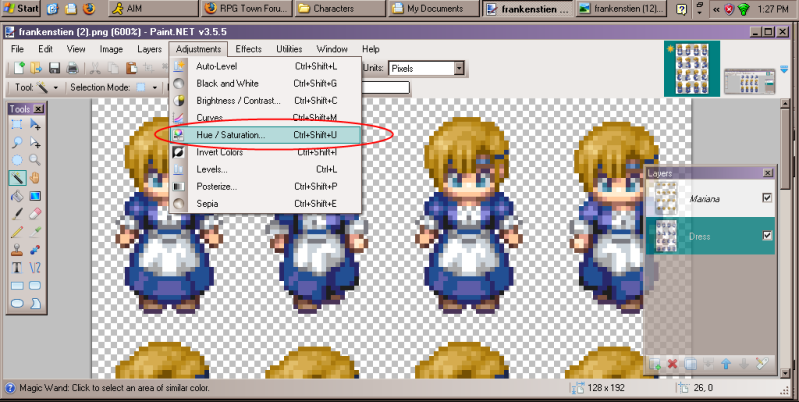
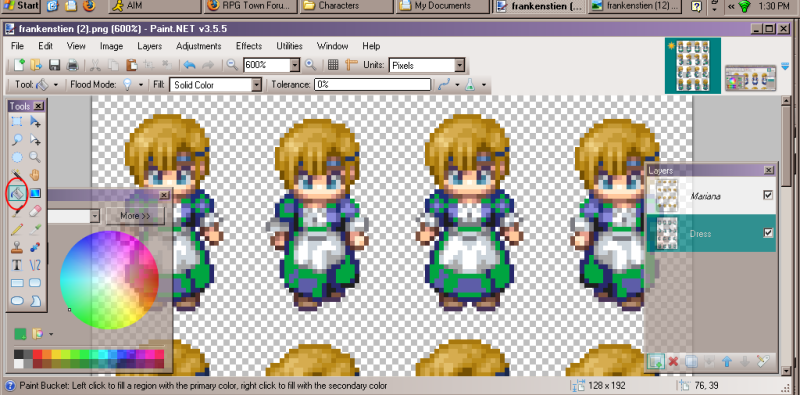
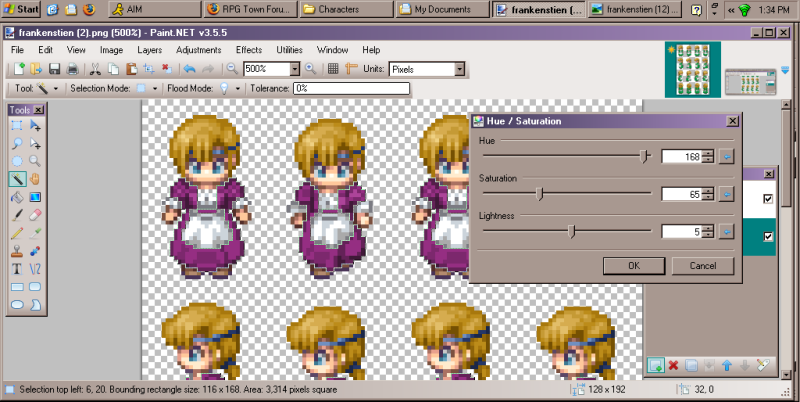
Now to the issue of recoloring your creation. Most of this will be done in Hue / Saturation, as shown.
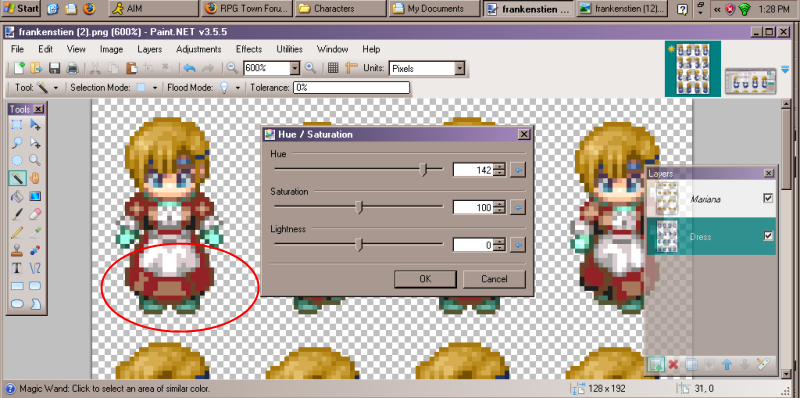
However in the case of this dress I'm going to have to do a little extra. Because of where the colors of the highlights are set it looks really wonky if I just change the hue, see:
SO we're going to be doing this the by-the-color way. This is also the way to give a part which is black, white, or gray color, for example, changing gray armor to bright red. Sliding the hue and saturation around isn't going to do much since they're neutral colors.
Anyway, the dress. Let's make it green. I play around in the color menu until I get a green I like for the main color of the dress (between highlight and shadow).
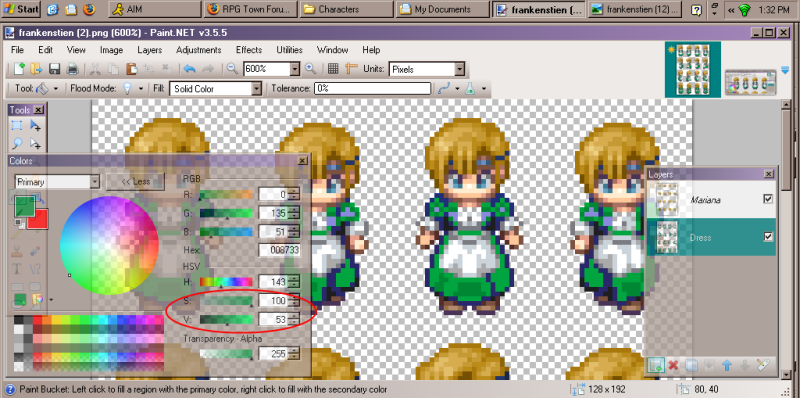
In order to color all pixels of a particular color another color you just have to hold down Shift when clicking on any section. Makes this VERY easy.
Next we need to get the shadows and the highlights. I'm starting with shadows. Please note that in order to get the colors to work together correctly you're not just going to mess with the value. In order to make accurate shadows, you need to LOWER value by 6 to 10 clicks and RAISE saturation by 2 to 4. For highlights, you need to RAISE value and LOWER saturation.
And there you go, the dress has been dyed a much more harmonious green.
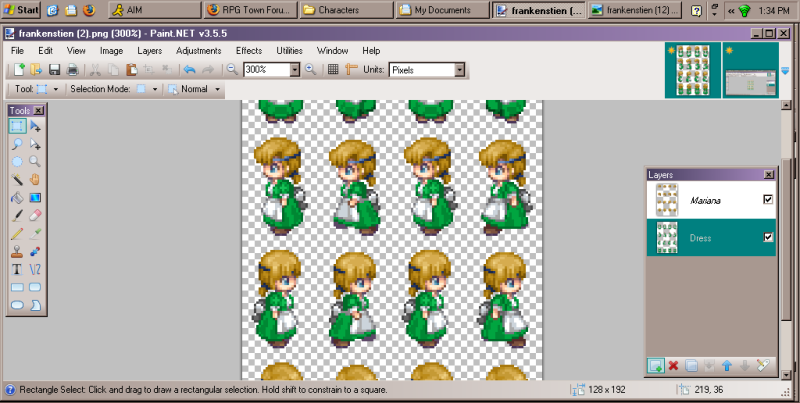
This will also make a good launch pad for messing with the hue and saturation to make it other colors.
Thank you for joining me for my mad scientist tutorial!
Notice:
Need a face-set or character sketch/concept P.M me. I draw mostly manga style though and it might take roughly a week